
Valentine’s Checkerboard Cookies
Checkerboard cookies are impressive to look at, but surprisingly easy to make! And who doesn’t love a crumbly butter cookie? A pop of pink makes these Valentine’s Checkerboard Cookies a great gift for your loved ones, while the classic chocolate and vanilla flavors are sure to suit a variety of tastes. And if you want to enjoy these year round, you can switch up the colors to fit any occasion.
Make the Base Dough
The base dough used in this recipe is a simple butter cookie dough. You will make a big batch of it that you will then divide in half to make the two flavors/colors for the checkerboard pattern.
To make the base dough, follow these simple steps:
In a medium bowl, whisk together flour, baking powder, and salt. Set aside.
In a large bowl using a handheld or stand mixer fitted with the paddle attachment, beat softened butter on medium speed until smooth. Add granulated sugar and continue to mix until light and fluffy.
Add one whole egg, one egg yolk, and vanilla extract and mix on medium speed until fully combined. Keep the extra egg white for later.
Add the dry ingredients to the wet ingredients and mix on low speed until just combined. You will have a soft, crumbly dough like in the picture below.

Make the Two Flavors/Colors of Dough
Divide your dough in half. Set one half aside and put the other back in the mixing bowl.
First we’ll make the pink dough. Simply mix pink food coloring into the base dough until you have your desired shade of pink. You could also do red or purple for a slightly different look. Transfer the dough to a clean work surface and shape it into a block that is approximately 2 inches high, 2 inches wide, and 6 inches long (see image below). Wrap tightly in plastic wrap.
Next up is the chocolate dough. Put your remaining dough back in the mixer and add 2 Tbsp of cocoa powder and 1 Tbsp of milk (any milk will do!). Mix until fully combined. Transfer the chocolate dough to your clean work surface and shape into a block the same size as the pink dough. Tightly wrap in plastic wrap.
Chill your dough in the refrigerator for at least 1 hour.

Slice the Dough
Once the dough has chilled, remove it from the refrigerator, unwrap it, and put it on a cutting board. Cut each block into 3 equal slices the long way so you have rectangular sheets. Then cut each of those into 3 long strips. You will have 9 long, thin strips of each color (18 in total) like in the picture below.

Form the Checkerboard Pattern
To form the checkerboard pattern, start by laying down 3 strips of dough of alternating color side by side, gently pushing them together so they stick. Then, place strips of the opposite color on top of those, pressing to stick together. Finally, repeat for a third layer, alternating colors again so you have a checkerboard pattern when you look at the square side (left image below)
Repeat that process with the remaining dough, but this time making sure you start with the opposite color pattern. So if you started with pink-chocolate-pink the first time, now start with chocolate-pink-chocolate (or vice versa). Your final dough blocks should like right image below when viewing from the top.
Individually wrap the dough blocks tightly in plastic wrap, gently compressing to make sure the different sections adhere to each other. Refrigerate for at least 2 hours.


Slice and Prep the Cookies
Preheat the oven to 350°F. Line baking sheets with parchment paper or silicone baking mats.
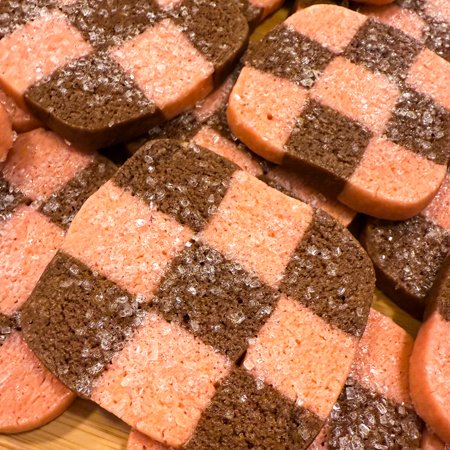
Remove the dough from the refrigerator and unwrap. Slice each block into 12 1/2-inch thick cookies (you will have 24 cookies in total) and place on the prepared baking sheets at least 1 inch apart. If desired, you can trim the edges for more neat, square cookies.
If you want to add some texture and additional sweetness to your cookies, you can top with an egg wash and coarse sugar. To make the egg wash, whisk together 1 Tbsp of water and the leftover egg white. Brush a thin layer of egg wash over each cookie and sprinkle with coarse sugar.

Bake the Cookies
Bake for 12-14 minutes until the cookies are slightly browned around the edges. They will puff up slightly. Allow to cool on the pan for at least 5 minutes before transferring to a wire rack to finish cooling.


Store leftover cookies in an airtight container at room temperature for up to 1 week or freeze for up to 3 months.

Valentine's Checkerboard Cookies
Ingredients
- 2 and 1/2 cups all purpose flour
- 1/2 tsp baking powder
- 1/2 tsp salt
- 1 cup unsalted butter, softened to room temperature
- 1 cup granulated sugar
- 1 whole egg + 1 egg yolk, saving the white for an optional egg wash
- 1 and 1/2 tsp vanilla extract
- pink food dye
- 2 Tbsp unsweetened cocoa powder
- 1 Tbsp milk
- Optional: 1 Tbsp water (for egg wash), coarse sugar for sprinkling
Instructions
- In a medium bowl, whisk together the flour, baking powder, and salt. Set aside.
- In a large bowl using a handheld or stand mixer fitted with the paddle attachment, beat the softened butter on medium speed until smooth. Add the sugar and continue to mix until light and fluffy.
- Add the whole egg, egg yolk, and vanilla and mix on medium speed until fully combined.
- Add the dry ingredients to the wet ingredients and mix on low speed until just combined.
- Divide the dough in half, setting one half aside and returning the other half to the mixing bowl. Add 2 drops of pink dye and mix until fully combined. If you would like a more vibrant pink you can add additional dye, but be careful not to overmix. Transfer to a clean work surface. Form the dough into a rectangular block about 2 inches tall, 2 inches wide, and 6 inches long. Tightly wrap in plastic wrap and refrigerate for at least 1 hour.
- Add the other half of the dough back to the mixer bowl. Add the cocoa powder and milk and mix until fully combined. Transfer to a clean work surface and form into a block the same way you did the pink dough. Both dough blocks should be the same size. Tightly wrap in plastic wrap and refrigerate for at least 1 hour.
- After the dough has chilled, remove from the refrigerate and unwrap. For each block, cut into three equal sections the long way (so you have rectangular sheets that are 2 inches wide and 6 inches long) then cut each of those sheets into three equal strips. You will get 9 long, thin strips of dough from each color.
- Now you will make two 3 by 3 blocks. To do this, start by laying down three strips of dough in alternating colors side by side. Gently push them together so they stick. Then, add the opposite color strip on top, gently pressing together once again. Repeat for a third layer. You should now have one 3x3 block that looks like a checkerboard from head on. Repeat with the remaining dough. This time the corners of the block will be the opposite dough as the first block (so if your first block had chocolate corners, your second block will have pink corners). Tightly wrap each checkered dough block in plastic wrap, making sure all of the layers are stuck together. Refrigerate for at least 2 hours.
- Preheat the oven to 350°F. Line baking sheets with parchment paper or silicone baking mats.
- Remove the dough from the refrigerator and unwrap. Slice each block into 12 1/2-inch thick cookies (you will have 24 cookies in total). If desired, you can trim the edges for more neat, square cookies.
- Optional: Whisk together 1 Tbsp of water and the leftover egg white. Brush a thin layer of egg wash over each cookie and sprinkle with coarse sugar.
- Bake for 12-14 minutes until the cookies are slightly browned around the edges. Allow to cool on the pan for at least 5 minutes before transferring to a wire rack to finish cooling.
Notes
- Storage Instructions: Store leftover cookies in an airtight container at room temperature for up to 1 week or freeze for up to 3 months.
- Make-Ahead Instructions: Tightly wrapped dough blocks can be refrigerated for up to 4 days or frozen for up to 3 months. Allow frozen dough to thaw in the refrigerator overnight before slicing and baking.


